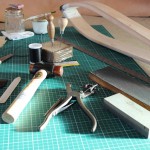
Basic Leatherwork Kit

New to leatherwork and wondering which tools are essential for your new hobby? Then read on…
Wooden stitching clam (or clamp): An essential piece of kit used to hold the leather while you stitch. These are generally for use with a tall stool. You can buy your clam from ‘Le Prevo’ and the link here will take you to an image of one on their website.
http://www.leprevo.co.uk/photos/sewing-clam.htm
Harness awl: Needed for piercing diamond shaped holes into the leather as you stitch. You can buy one with a blade pre-set in it’s haft and pre-sharpened from ‘Bowstock Leatherworking Supplies’, or you can buy the blade and haft separately and set the blade yourself. Harness awl blades come in different sizes (often shown in mm) and if you’re going to be making small leather projects to start, then a 37mm or 45mm could be a good size.
Harness Needles: You will certainly need these for hand-stitching. These needles are blunt so are only used to feed the linen thread through the pre-pierced holes that you made with your harness awl. Usually numbered according to size. 002, 003, 004 etc
Scratch Awl: Think of this as the leatherworkers pencil. They’re inexpensive and very useful so I think every toolkit should have one.
Bone folder: Needed to ‘turn’ moistened leather. For example, when fitting a ‘U’- gusset into a bag, or when folding wet leather back onto itself. I couldn’t think of a substitute for the bone folder that wouldn’t scratch or damage the leather during this process so have included it as ‘essential’.
Linen Thread: For hand-stitching… of course! If you’re only buying one 50g spool then perhaps choose a waxed 18/3 cord in a traditional colour such as black, brown or white. For heavier projects, use an 18/4
Beeswax: This is used to run your linen thread across when you’re ‘preparing a thread’. It will coat the linen helping to give a nice, smooth run as you hand stitch. A small 30g block will last quite some time, although it’s useful to have one extra just for the white, or lighter coloured threads.
Pricking Iron: Used to mark the stitches on the leather before stitching. They come in different sizes and with different numbers. The sizes reveal the width of the tool, while the numbers dictate how many teeth or stitches per inch. A good all-rounder would be a 1″ No7
Knife: A good knife is of course essential for leatherwork so a shoemakers, or a clickers knife are both a good choice. The shoemakers is relatively inexpensive but will need to be kept sharp, while the clicker has changeable blades and can be fitted with a curved blade for a neat finish to rounded edges.
Steel rule: if you’re just getting one size then a 60cm (24”) would work well for most projects.
Hole Punch: if you don’t have access to a really good rotary punch then you can purchase different sized individual punches as you gradually build up your toolkit. If you’re going to be fitting poppers, Sam Browne studs etc then start with a number (which will represent the diameter of the hole in mm) which is likely to be suited to most tasks.
Hammer: Essential for knocking out holes, tapping the pricking iron, fitting poppers etc so get a med weight that will do most of the jobs needed. We use ‘Thor’ hammers which are relatively heavy. They have copper on one side and rawhide on the other – always use the rawhide with your leatherwork tools!
Edges: You’ll need some dye to run along the edges of your work and as these are available in quite small bottles, you’ll soon build up a little collection of colours but initially a black and tan will be fine for most tasks. To polish up the edges you’ll need some ‘gum tragacanth‘ solution which can be purchased from most leatherwork suppliers and a lint free cloth – B&Q sell cloths for applying oil to garden furniture and we find that these work well for burnishing.
Sandpaper: One sheet of a medium and a fine grade will be ample. You won’t need much at all, just very small pieces to hook under your finger if you want to smooth off your edges before dyeing and burnishing. Also useful when glueing two pieces of leather together as a quick rub with the medium grade on both sides to be glued, will result in a much better ‘stick’.
Glue: Leatherworkers PVA is pleasant to use and gives great results. A small amount lasts quite a while but remember to wipe your brush dry before dipping into the glue pot – this will help to avoid having watery glue!
Finally, don’t forget that you’ll need to keep your tools very sharp so invest in a sharpening stone and a strop.
