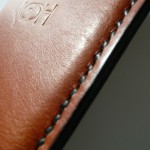
Cut Edge Seam
Making a cut edge seam
 Let’s assume that we are making a leather product which has just two pieces exactly the same size; a back and a front, which are to be hand-stitched together – perhaps it’s a simple card slip, mobile phone slip or similar.
Firstly, having cut out the leather, the glue lines will need to be marked/drawn on to the flesh sides of the two pieces along the three edges to be joined. These are often marked at 6mm from the outside edge(s).
The stitch lines should then be marked 3mm from the outside edge(s) on the grain sides again, along the three edges to be joined. The front piece (only) of the slip should have the stitch marks made using the pricking iron.
The edges which are to allow for the opening of the slip, should now be edge dyed and edge burnished individually.
Having prepared a thread of a suitable length, the two pieces of leather should have glue applied to the areas within the glue lines. When the glue is tacky (rather than wet) place the flesh sides together with the edges carefully aligned, before hand stitching
The three stitched edges are then sanded with a medium or fine grade sandpaper, edge dyed and edge burnished together, as one. Ideally, the finished seam should look as though it is just one piece of leather, rather than two.
This seam may be used with either a leather lined, or unlined bag.
Advantages of the cut edge seam are that it is the least labour intensive and often is the most practical.
The disadvantages of this seam are that it is difficult to use with a ‘fixed’ fabric lining as the fabric may show through the edges of the seam, leaving an unsightly finish.
TIP: It is sometimes helpful to sand gently within the glue lines to ensure a better grip of the two pieces of leather to be joined.
