How to Shape a Leather Billet Tip
Shaping a leather billet tip:
 Shaping a leather billet tip isn’t as difficult as you might think. Just take some stiff card, a ruler or square and a compass, then follow these instructions…
-
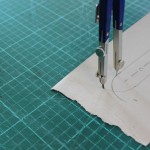
Step 1 – After drawing the first curve, reposition the compass point to the opposite side
Using a ruler and fine tipped pencil, draw a rectangle the width of the required billet onto a piece of stiff card. Make the rectangle longer than you want the billet as it will be trimmed later.
- Draw a centre line lengthways.
- Use a square to make sure that both long edges are exactly the same length.
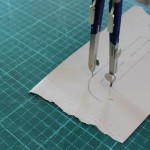
- Set the compass to the full width of the billet and position the point on the very end of one long side of the rectangle.
- Draw the compass across to the other side – the result should be a ‘curve’.
- Now repeat that action for the other side of the rectangle – a second ‘curve’ should have now fully formed the end shape of the billet.
- To make your billet the correct length, use a square to draw a line across the top edge.
- Cut out the pattern piece and overlay onto a strong piece of leather that you have selected for the billet.
- Use the scratch awl to score around the edges of your pattern.
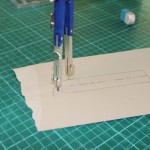
Step 2 – Draw the second curve
- When cutting the billet shape out of the leather, use a curved blade to cut out the shaped billet end.
- Use the centre line on the pattern piece to mark a dot at the top of the leather billet, so that it can be lined up with the centre line on the flap or whatever it is to be fitted to.
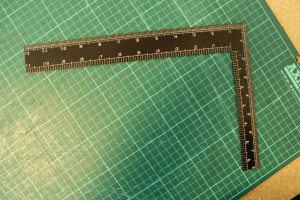
Use a square for accuracy
TIP: This technique can also be used to make the ends of bag handles.
Step 3 – complete the second curve, allowing the two curves to cross