Piped Seam for a leather bag
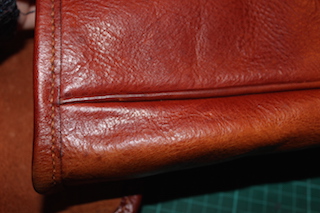
A leather bag showing part of a piped seam
Piped Seam
An attractive seam which is used for raw edges that are to be worn on the inside of the bag rather than the outside. The piping will be fitted with the bag being made inside-out. The piped seam will be visible once the bag has been turned the right-way-around, after the piping work is complete.
3mm divider lines will need to be drawn on the flesh side of the two main piecesthat are to be joined (for example; bag front piece and gusset), with one side having the stitch marks added, using the pricking iron – the piping will be sandwiched between these two pieces.
A separate, strip of leather, which will be used to house the piping cord, should be pared down to a suitable thickness. The width of this strip will depend on the circumference of the cord, but should be wide enough to wrap around the cord with both edges meeting and having 6mm overhang below the wrapped piping. There is no need to mark stitch lines onto this strip but you may want to edge dye and burnish particularly if the bag is not going to be lined.
Leather binding strip with inner core
The strip of leather once pared, should have PVA glue applied to it and the piping core placed along the centre (flesh side) lengthways, stopping approximately 8mm from each end. Fold the leather strip in half lengthways, encasing the piping core as you do so. Use the pointed end of the bone folder to push the core up and into place, ensuring that the two long edges are aligned. Secure with leather or felt covered bulldog clips until the glue has dried.
Use the dividers to mark a 5mm line along both grain sides of the long edges of your piping strip and sand, taking care not to sand above the line(s). Now draw 5mm divider lines on to the grain sides of the edges of your two pieces of leather that are to sandwich the piping. Again, sand within the 5mm line(s). These sanded areas will encourage a better grip of the pieces when glued, thus preventing slippage when basting/tacking and stitching.
In preparation for holding the four layers of leather together, prepare a long thread with one needle. Tip: Use a thread which can be easily seen. Glue and baste/tack the piping into position, using the harness awl in the stitch marks previously made on one flesh side – the tacking/basting stitches need not be as small as those marked; it is acceptable to pierce, then push the needle through every four or five stitch marks thus skipping the ones in between. Once the piping has been secured, saddle stitch together, cutting and removing the tacking stitches as you work your way along the seam.
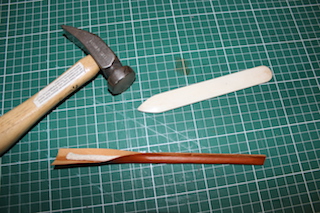
Once stitched, use a rounded hammer to gently flatten out the piped seams before turning the bag.
Note: A natural core is often a good choice for the piping material. It is not essential to include any core at all, but the finished look is more attractive with a core as it forces a ‘rounding’ to the piping strip.
Now that you’ve practised making a piped seam, learn how to make a bound edge seam