Taking Pictures of your finished leatherwork projects
 When you have finished your leatherwork project, the next step is to take pictures of it either as a record of your work, or maybe even to sell.
We don’t claim to be experts at this but we do know that taking photos of your work takes time and a little effort. If the image isn’t clear and it doesn’t show the product off to it’s best advantage, it’s unlikely that anyone will buy it! As someone once said about poor product images… “it’ll be like trying to sell a bowl of melted ice-cream!” …
To begin, you’ll need a clear space to work in. Try creating a background which you think will look good with your project set against it using a white board, black board, or even a plain white wall. Alternatively you could create a background setting using a leather shoulder or hide, then place your project on it, or in front of it. If a plain background isn’t an option, you will still need to set your background up – Position your product where you want it and just look through the viewfinder on the camera, looking past your product for anything in the background which distracts the eye, then move these out of your frame.
The lighting in the room is really important so if you’re able to it’s always best to take photos in the natural light however, if this isn’t possible and you’re trying to do this after dark make sure that you have your flash on!
Whatever time of day it is though, once you’ve set up take a few test shots just to check if there are any shadows, or unwanted objects in the background.
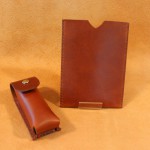
If you’re taking a photo from a selling perspective, make sure that you have photographed the product from different angles showing the side and back as well as the front view. Also pay attention to close up photos of any detail in, or on the product. – the flower symbol on the camera is often used for this. Depending on where these images will be displayed, you may need to include measurements which can either be given in text, or by laying a ruler alongside the item when you photograph it. Don’t forget to include images of any specific interior features too. Sometimes it’s good to add a photo with an everyday item placed next to your product (something relevant, for example scissors, standard size hammer etc) so that potential customers have an idea of the actual size.
All cameras are different, sometimes having different settings to others so take some time to get to know your camera and practice using it in different situations. If taking pictures just isn’t your thing and despite your best efforts you’re just not happy with the images, it’s best to not use them at all and either hire a proffessional to do the job, or enlist the help of a friend who can take great pictures!