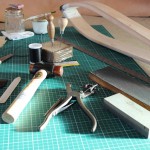
Make a Leather Card Slip Part 1 Tool Up
Beginners Project: Make a Leather Card Slip Part 1 Tool up

General leather-work tools
In the first of our 3 Part series ‘How To Make a Leather Card Slip’, we’re starting with a simple, yet very useful project. The card slip is a great starter project as it’s relatively quick to make and will help build your confidence. Below we’ve included a list of everything you’ll need but don’t worry too much if you have a different sized Pricking Iron or thread to that shown here as we’re aiming for good results at this stage, rather than absolute perfection! 🙂 Provided you have a basic toolkit you can make use of what you have and still get great results!
Work through the project slowly and methodically, following the steps given. Once you’ve mastered the basic skills you can progress to making larger, more advanced projects. See our new leatherwork magazine, ‘Waxing the Thread’, for follow-on patterns, tips and techniques.
This project is best suited to using vegetable tanned leather, particularly as the edges are to be burnished.
What’s involved?
Making a leather card slip will cover many leather-working techniques and you may be surprised at the amount of tools and work involved, in making such a small item.
Here’s what you’ll need:
- 1.2 – 1.6mm Vegetable Tanned Leather
- 3/25 linen thread
- Cutting mat
- Pattern card (any stiff card will do)
- Fine tipped Pencil
- Sharp knife
- Scratch Awl
- Dividers
- Pricking Iron (ideally a No 8 or No 10)
- Hammer
- Sharp Harness Awl
- Two Harness Needles
- Stitching Clam (or willing helper!)
- Edge dye and applicator
- PVA glue and brush
- Burnishing solution (Gum tragacanth) and lint free (ideally) cloth.
- Leather conditioner and soft cloth
Once you’ve got everything shown on the list, go to our next blog post ‘How to make a leather card slip – Part 2′ Pattern Making.’‘
