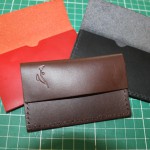
How To Make a Leather Card Slip – Part 3. Assembly
Assembly
 This is the last of the 3 Part series, ‘How To Make a Leather Card Slip’. If you have your pattern pieces prepared as shown in Part 2. of this series, you’re ready to assemble your leather project; full assembly instructions are here…
- Lay the pattern pieces face up on to the grain side (right side) of the leather and hold in place with weights.
- Carefully score around the pattern pieces with the scratch awl.
- Transfer pattern markings such as the stitch lines by gently pressing down with the point of the scratch awl where they start and end. (Note that the glue lines and fold line will be transferred to the the flesh side, rather than the grain side of the leather, so these may be ignored at this point).
- Lift the pattern pieces and put aside.
- Carefully cut out the two corresponding parts of the leather card slip – for the purpose of this ‘how-to’, these parts will be referred to as ‘Back’ part and ‘Front’ part.
- With the ‘Back’ and ‘Front’ parts grain side up, use the dividers set at 3mm to score the stitch lines, starting and finishing at the points made earlier with the scratch awl.
- Flip the ‘Back’ and ‘Front’ parts of the leather card slip over so that they are flesh side up, overlay the corresponding pattern pieces again, then transfer pattern markings such as the glue and fold lines by gently pressing down with the tip of the scratch awl where they start and end.
- With the ‘Back’ and ‘Front’ parts still flesh side up and the dividers set at 6mm, score the glue lines on both parts.
- With the ruler and scratch awl score firmly along the position of the fold line firstly making sure it is flesh side up.
- Working along the stitch line, use the pricking iron and hammer to tap out the stitch marks on the grain side of the ‘Front’ part only.
- Edge dye and burnish the top long edge of the ‘Front’ part.
- With the ‘Back’ part flesh side up, dampen the fold line and gently ease the flap over and into it’s ‘closed’ position using a ruler and bone folder.
- Flip the ‘Back’ and ‘Front’ parts of the leather card slip over so that the flesh side is facing up, then apply PVA glue within the 6mm glue lines on both.
- When the glue is ready, carefully place the ‘Front’ part of the card slip onto the ‘Back’ part, flesh sides together, making sure that all three edges are neat and not overlapping.
- Secure with leather covered bulldog clips until dry.
- Prepare a thread which is four times longer than the entire distance to be stitched, then add approximately 15cms.
- Using a stitching clam and sharp harness awl, saddle stitch along the three sides of the card slip; work back two stitches (three holes) at the end.
- Using a medium grade sandpaper along the doubled edges only, smooth off any roughness and finish with a fine grade sandpaper.
- Edge dye all edges of the card slip taking particular care along the edges of the flap.
- Burnish all edges.
- Apply a small amount of leather conditioner to your completed card slip
Congratulations on completing this project!
Tip: The vegetable tanned leather will easily stretch to accommodate a number of cards.
PS: If you missed Part 2 of this series visit https://gdhleathercourses.co.uk/blog/make-leather-card-slip-part-2-pattern-making/
